How to Draw a Realistic Eye From the Side
Help me understand this content,
Lightly draw a circle for the eyeball. It doesn’t have to be perfect because we’re only going to use it during the construction process of the eye and then we’ll erase it completely. Draw a small bump or cornea in the direction you want the eye to face. In terms of sizing, the cornea’s length is roughly half of the eyeball’s diameter. Draw the iris by creating a curve that touches the top and bottom of the cornea. Make sure your linework is very light, so you can make changes easily. Erase part of the eyeball that crosses through the iris / cornea. Then inside the iris, draw a narrow oval for the pupil. Starting roughly from the center of the eyeball, lightly draw a curved line for the top eyelid. It can cover part of your iris or expose it completely, then wrap the eyelid around the other side of your eyeball. To draw the bottom lid, create a curve where the two eyelids meet and then continue your stroke toward the bottom of your iris. Right above the top eyelid, draw the eyelid crease. You can use the eyelid shape as a reference or draw a more uniquely shaped crease. Connect that pencil stroke to the top eyelid using a slight curve. To complete the bottom lid, I’m drawing a stroke that goes almost straight down, but you can angle it out or in if you want. Once you’re done, erase the circle guideline and parts of the iris that fall outside the eye-opening. Follow some more quick steps and here you are with a realistic looking eye from the side.
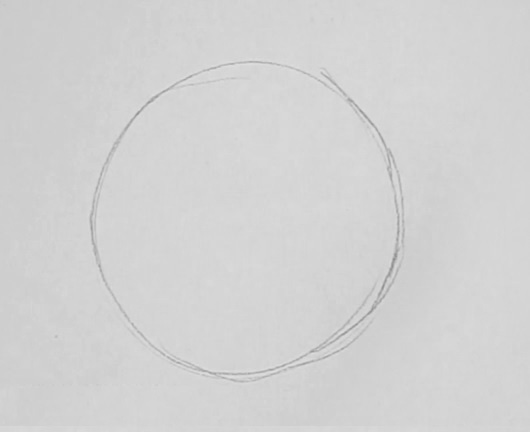
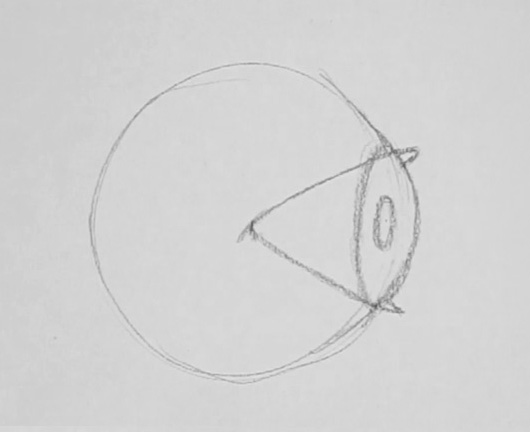
Lightly draw a circle for the eyeball. It doesn’t have to be perfect because we’re only going to use it during the construction process of the eye and then we’ll erase it completely.
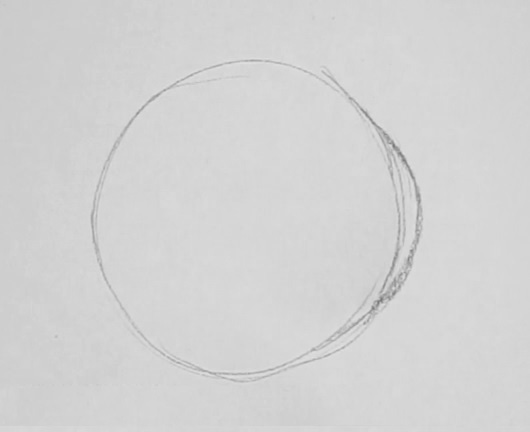
Draw a small bump or cornea in the direction you want the eye to face. In terms of sizing, the cornea’s length is roughly half of the eyeball’s diameter.
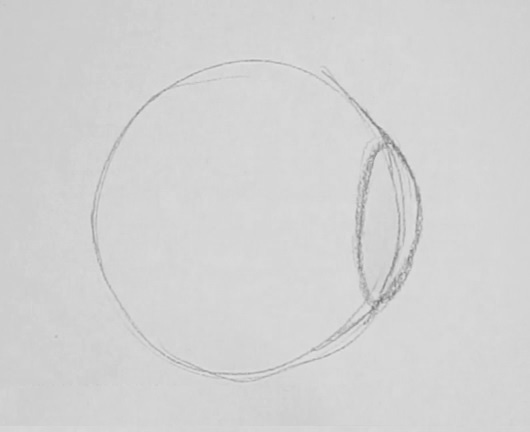
Draw the iris by creating a curve that touches the top and bottom of the cornea. Make sure your linework is very light, so you can make changes easily.
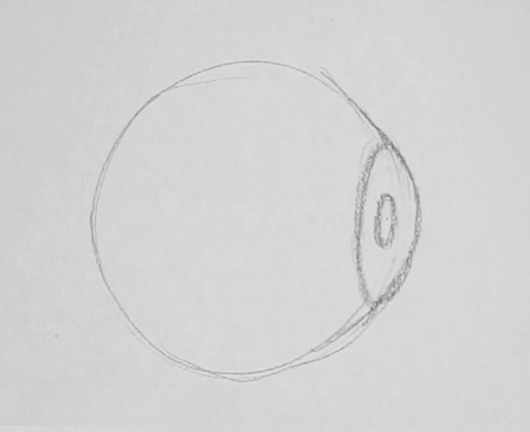
Erase part of the eyeball that crosses through the iris / cornea. Then inside the iris, draw a narrow oval for the pupil.
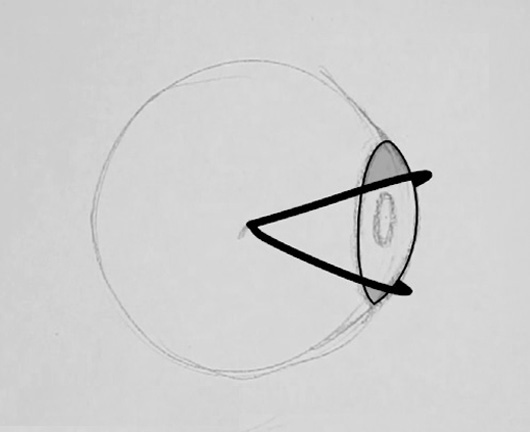
Starting roughly from the center of the eyeball, lightly draw a curved line for the top eyelid. It can cover part of your iris or expose it completely, then wrap the eyelid around the other side of your eyeball. To draw the bottom lid, create a curve where the two eyelids meet and then continue your stroke toward the bottom of your iris.
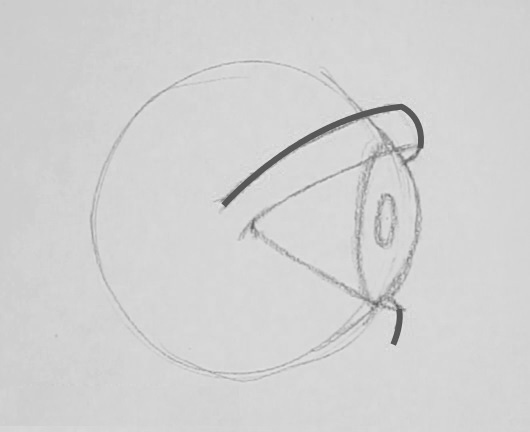
Right above the top eyelid, draw the eyelid crease. You can use the eyelid shape as a reference or draw a more uniquely shaped crease. Connect that pencil stroke to the top eyelid using a slight curve. To complete the bottom lid, I’m drawing a stroke that goes almost straight down, but you can angle it out or in if you want. Once you’re done, erase the circle guideline and parts of the iris that fall outside the eye-opening.
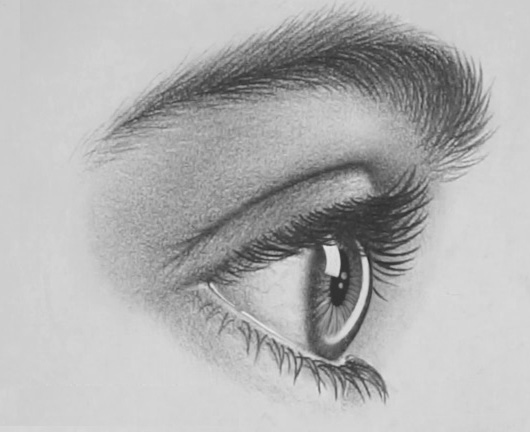
Follow some more quick steps and here you are with a realistic looking eye from the side.
Light•ly draw a cir•cle for the eye•ball.
It doesn’t have to be per•fect be•cause we’re on•ly go•ing to use it dur•ing the con•struc•tion pro•cess of the eye and then we’ll erase it com•plete•ly.
Draw a small bump or cor•nea in the di•rec•tion you want the eye to face.
In terms of siz•ing, the cor•nea’s length is rough•ly half of the eye•ball’s di•am•e•ter.
Draw the iris by cre•at•ing a curve that touch•es the top and bot•tom of the cor•nea.
Make sure your linework is very light, so you can make chan•ges eas•i•ly.
Erase part of the eye•ball that cross•es through the iris / cor•nea.
Then in•side the iris, draw a nar•row o•val for the pu•pil.
Start•ing rough•ly from the cen•ter of the eye•ball, light•ly draw a curved line for the top eye•lid.
It can cov•er part of your iris or ex•pose it com•plete•ly, then wrap the eye•lid around the oth•er side of your eye•ball.
To draw the bot•tom lid, cre•ate a curve where the two eye•lids meet and then con•tin•ue your stroke to•ward the bot•tom of your iris.
To draw the bot•tom lid, cre•ate a curve where the two eye•lids meet and then con•tin•ue your stroke to•ward the bot•tom of your iris.
You can use the eye•lid shape as a ref•er•ence or draw a more unique•ly shaped crease.
Con•nect that pen•cil stroke to the top eye•lid us•ing a slight curve.
To com•plete the bot•tom lid, I’m draw•ing a stroke that goes al•most straight down, but you can an•gle it out or in if you want.
Once you’re done, erase the cir•cle guide•line and parts of the iris that fall out•side the eye•open•ing.
Fol•low some more quick steps and here you are with a re•al•is•tic look•ing eye from the side.
based on instructions
by Darlene Nguyen